Settings (Collab)
Introduction
You can change the settings of your avatar and user's/room settings once you join the room.
Avatar Settings
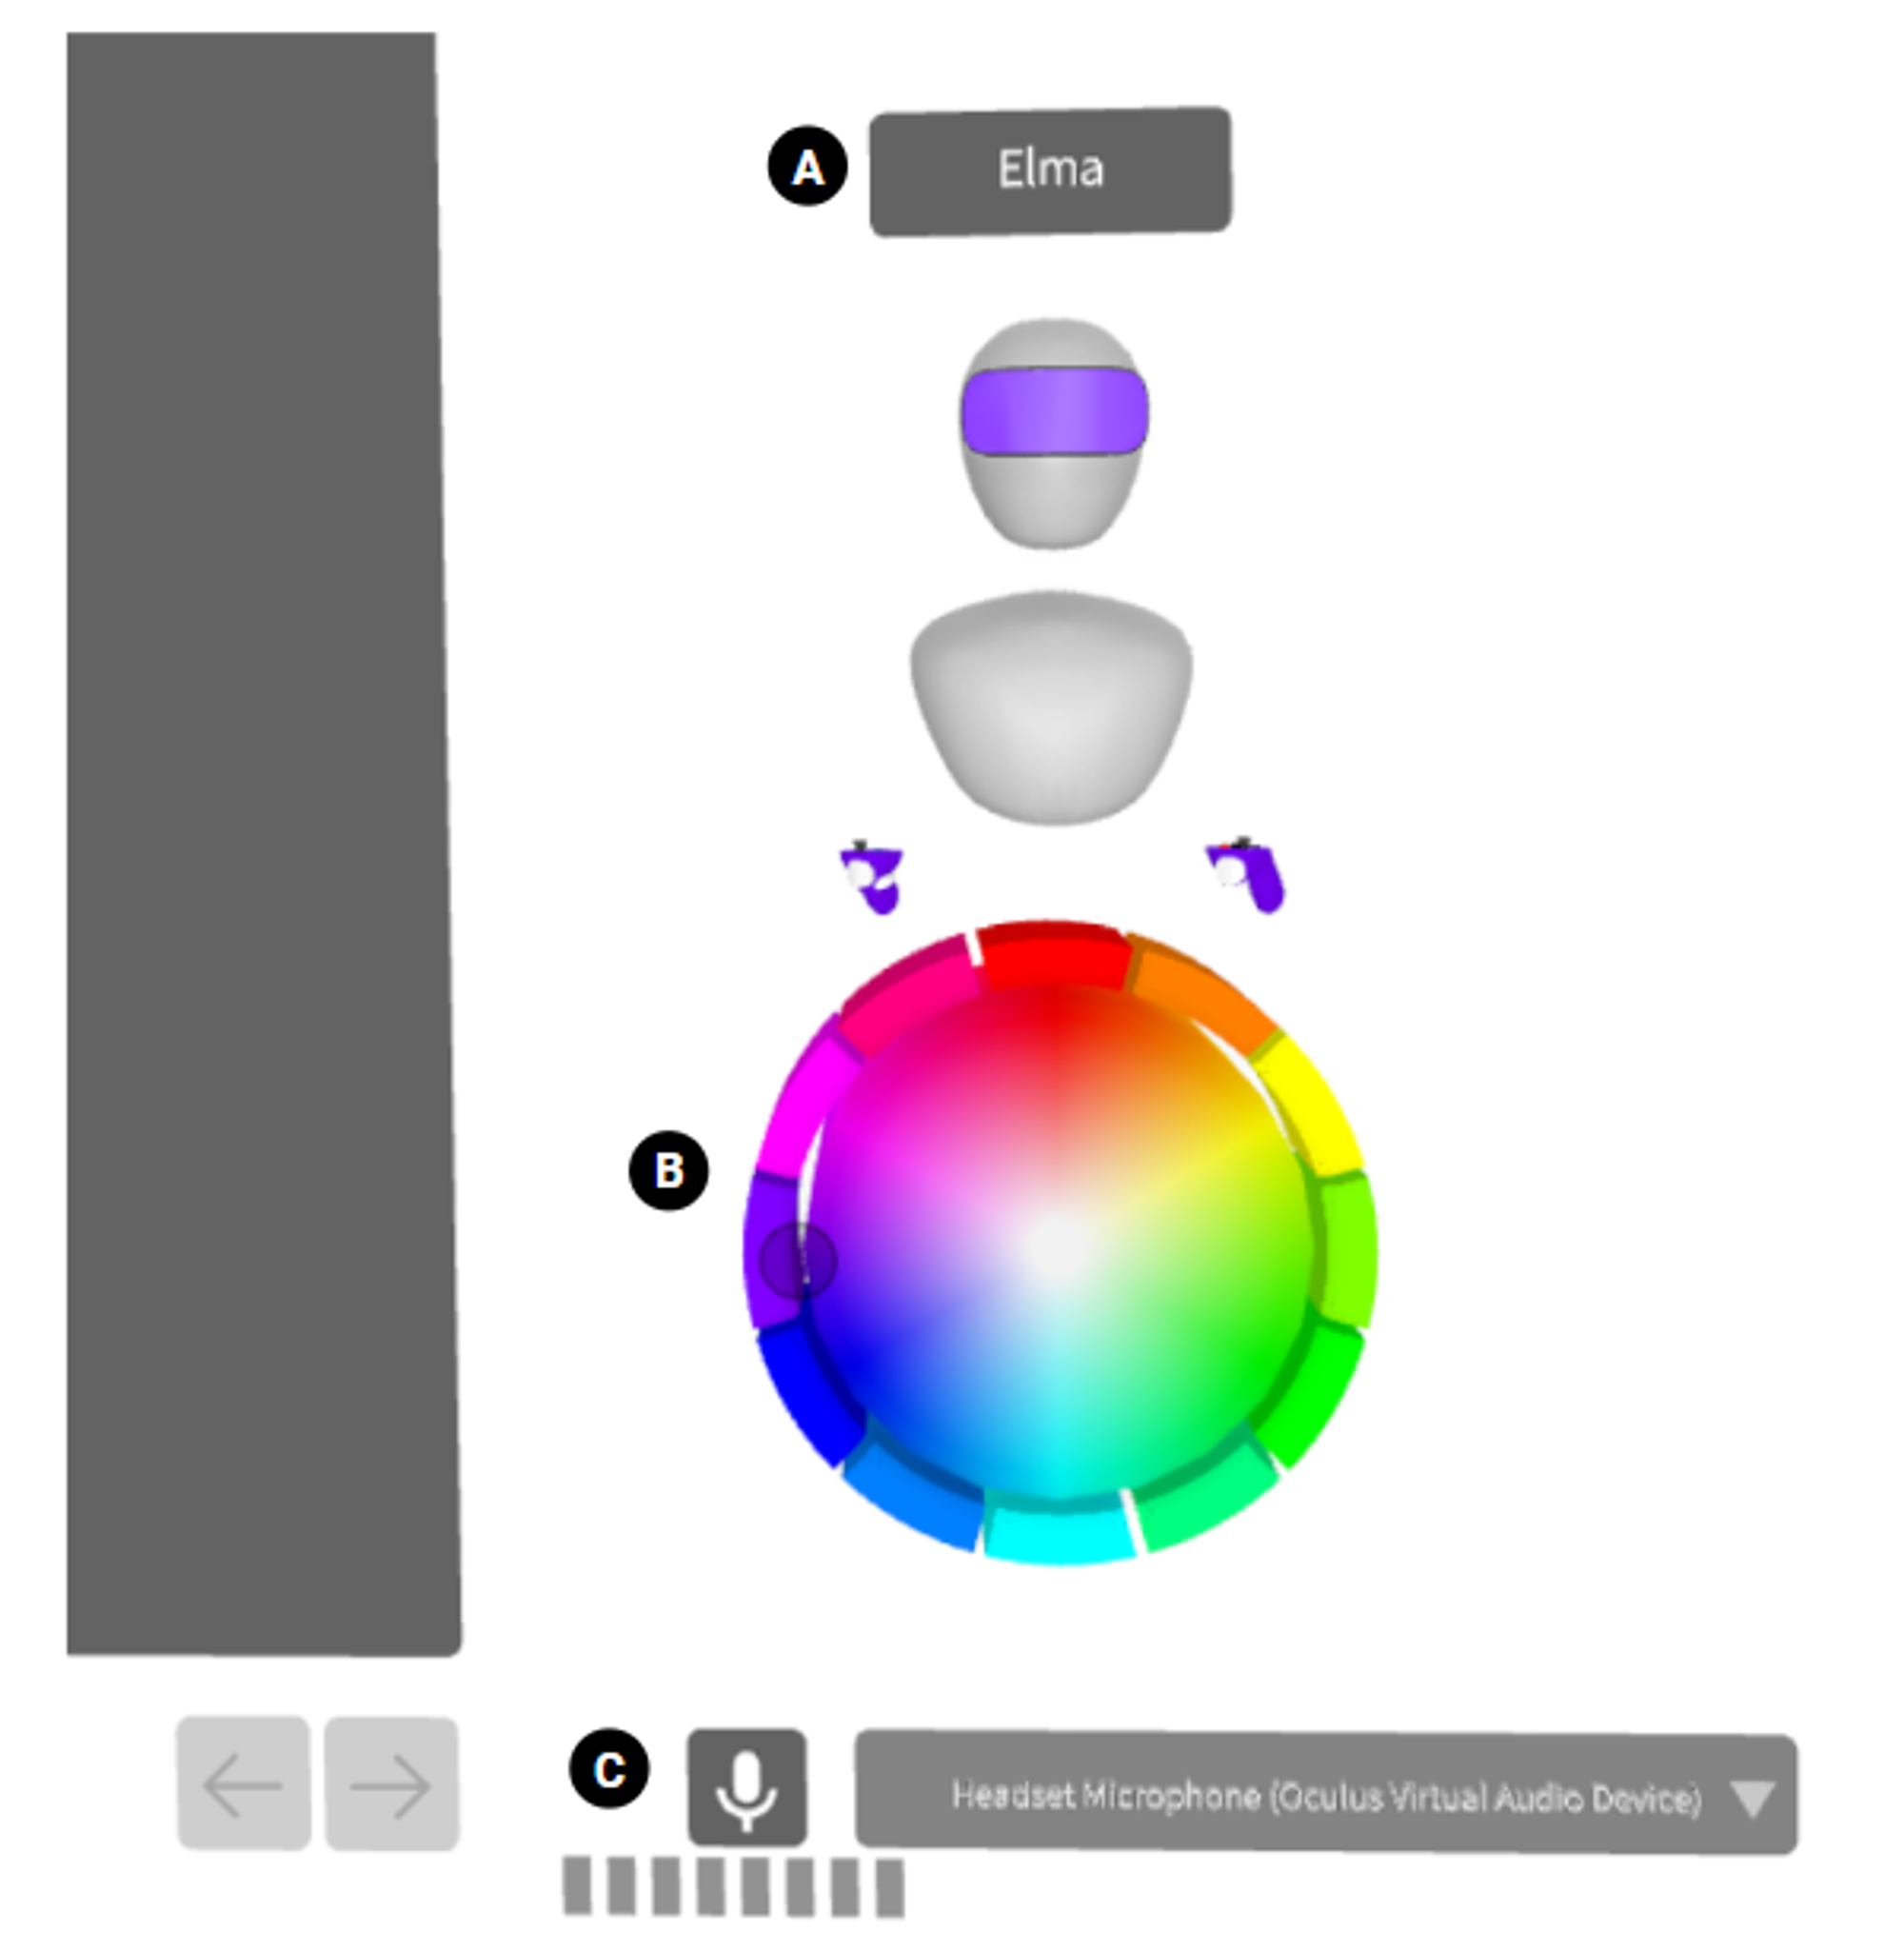
To make the collaboration easier you can edit your name, and avatar color and set the audio input settings in LandingPad Collab Menu which you can access from the Lobby.

A. Edit name: Click on the name and use the keyboard to type.
B. Color of your virtual headset: Move the circle around the color wheel to change the color of your virtual headset.
C. Microphone Settings: Select the audio source.
User’s Settings and Room Settings
To access the settings:
- Click the Blue Menu button
- Navigate to Online Users

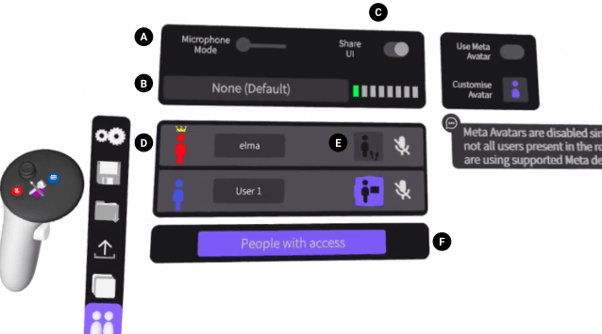
A. Microphone Mode: Switch your microphone on/off. Whichever mode you choose, you will always be able to control your audio from your non-drawing controller by clicking on the Microphone Button to turn it off or on.
B. Microphone source: If you have multiple sources for the microphone click on the drop-down menu to select the correct device for the audio input.
C. Share UI: This setting is turned on by default. Turn off if you wouldn’t like other users to see your UI when collaborating and great when teaching others.
D. Users: All users, present in the room, will be listed here.
Click on the user’s name to teleport yourself to their viewpoint and see what they are looking at. This is especially useful when working in large scenes.
The user with the crown is the King of the room and can control the additional settings such as environment settings. The King can pass the crown to other users by pressing the crown (Give Crown) next to the names of the users. To regain the crown, the King will need to pass the crown back to your name.
E. Invite all users to follow you: Select to invite users to follow your view.
F. Show UI: Click to make the UI of other users visible or invisible.
