Using Blender & Adobe Substance 3D programs, it’s possible to convert textured models into viewable prefabs in Gravity Sketch. Here are some best practices to keep in mind.
When using a wireless connection or headset like the Oculus Quest (Meta) 2, you will want to be conscious of the number of polygons you are using for mesh. The denser your mesh is, the more data the model holds. You will also want to limit the size of your texture maps. Texture maps will create larger files that hold more detailed information (bumps, cracks, creases, stitching etc.). Keep in mind that basic colors with no baked textures can be exported with little to no overhead. It is recommended to try and keep texture maps to a 1k resolution unless you have a reason to want them higher. If this is the case, we suggest a direct cable link to your desktop.
Exporting out of Blender
Here is how you can export a UV unwrapped model from Blender:
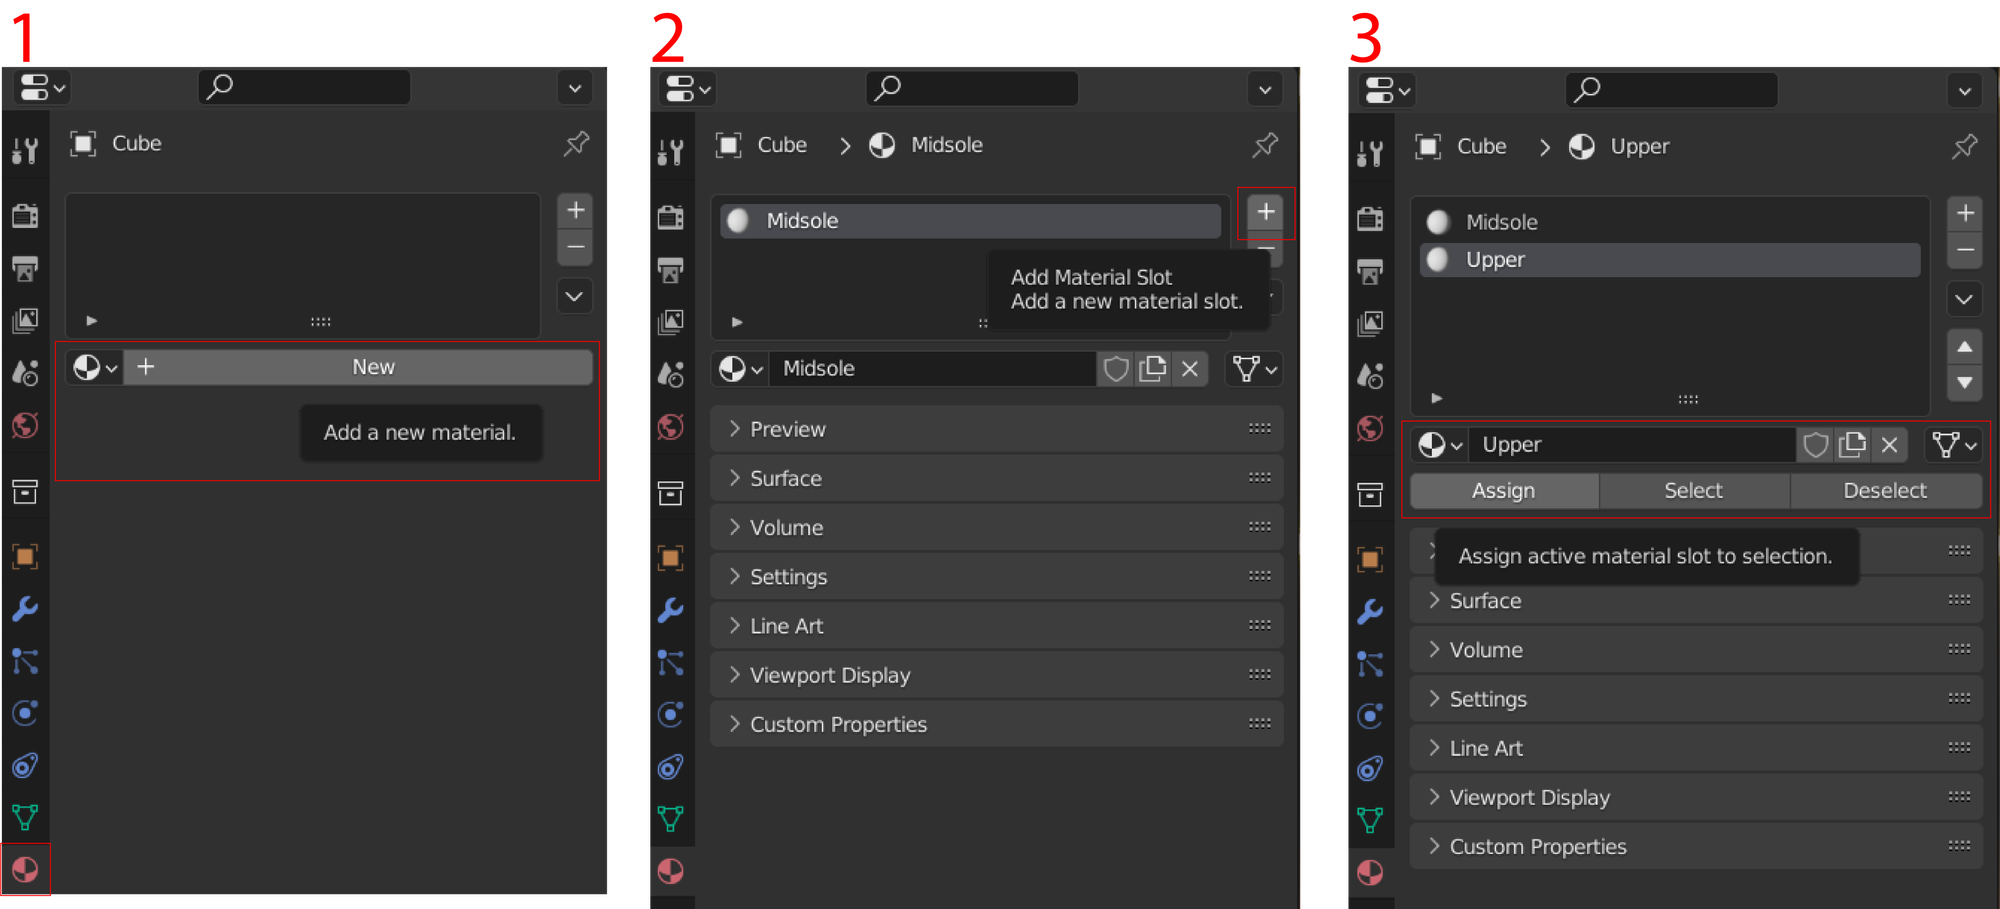
If you have multiple parts to your model that you would like to apply materials to separately, it is best practice to apply different materials for each object in Blender. Remember that diffuse colors do not affect file size. This is done to help Substance Painted better identify each individual part. This is not required but I often use it to keep parts organized. Follow the below steps in your materials panel inside of Blender:
1. Make sure your model is aligned on the X-Axis
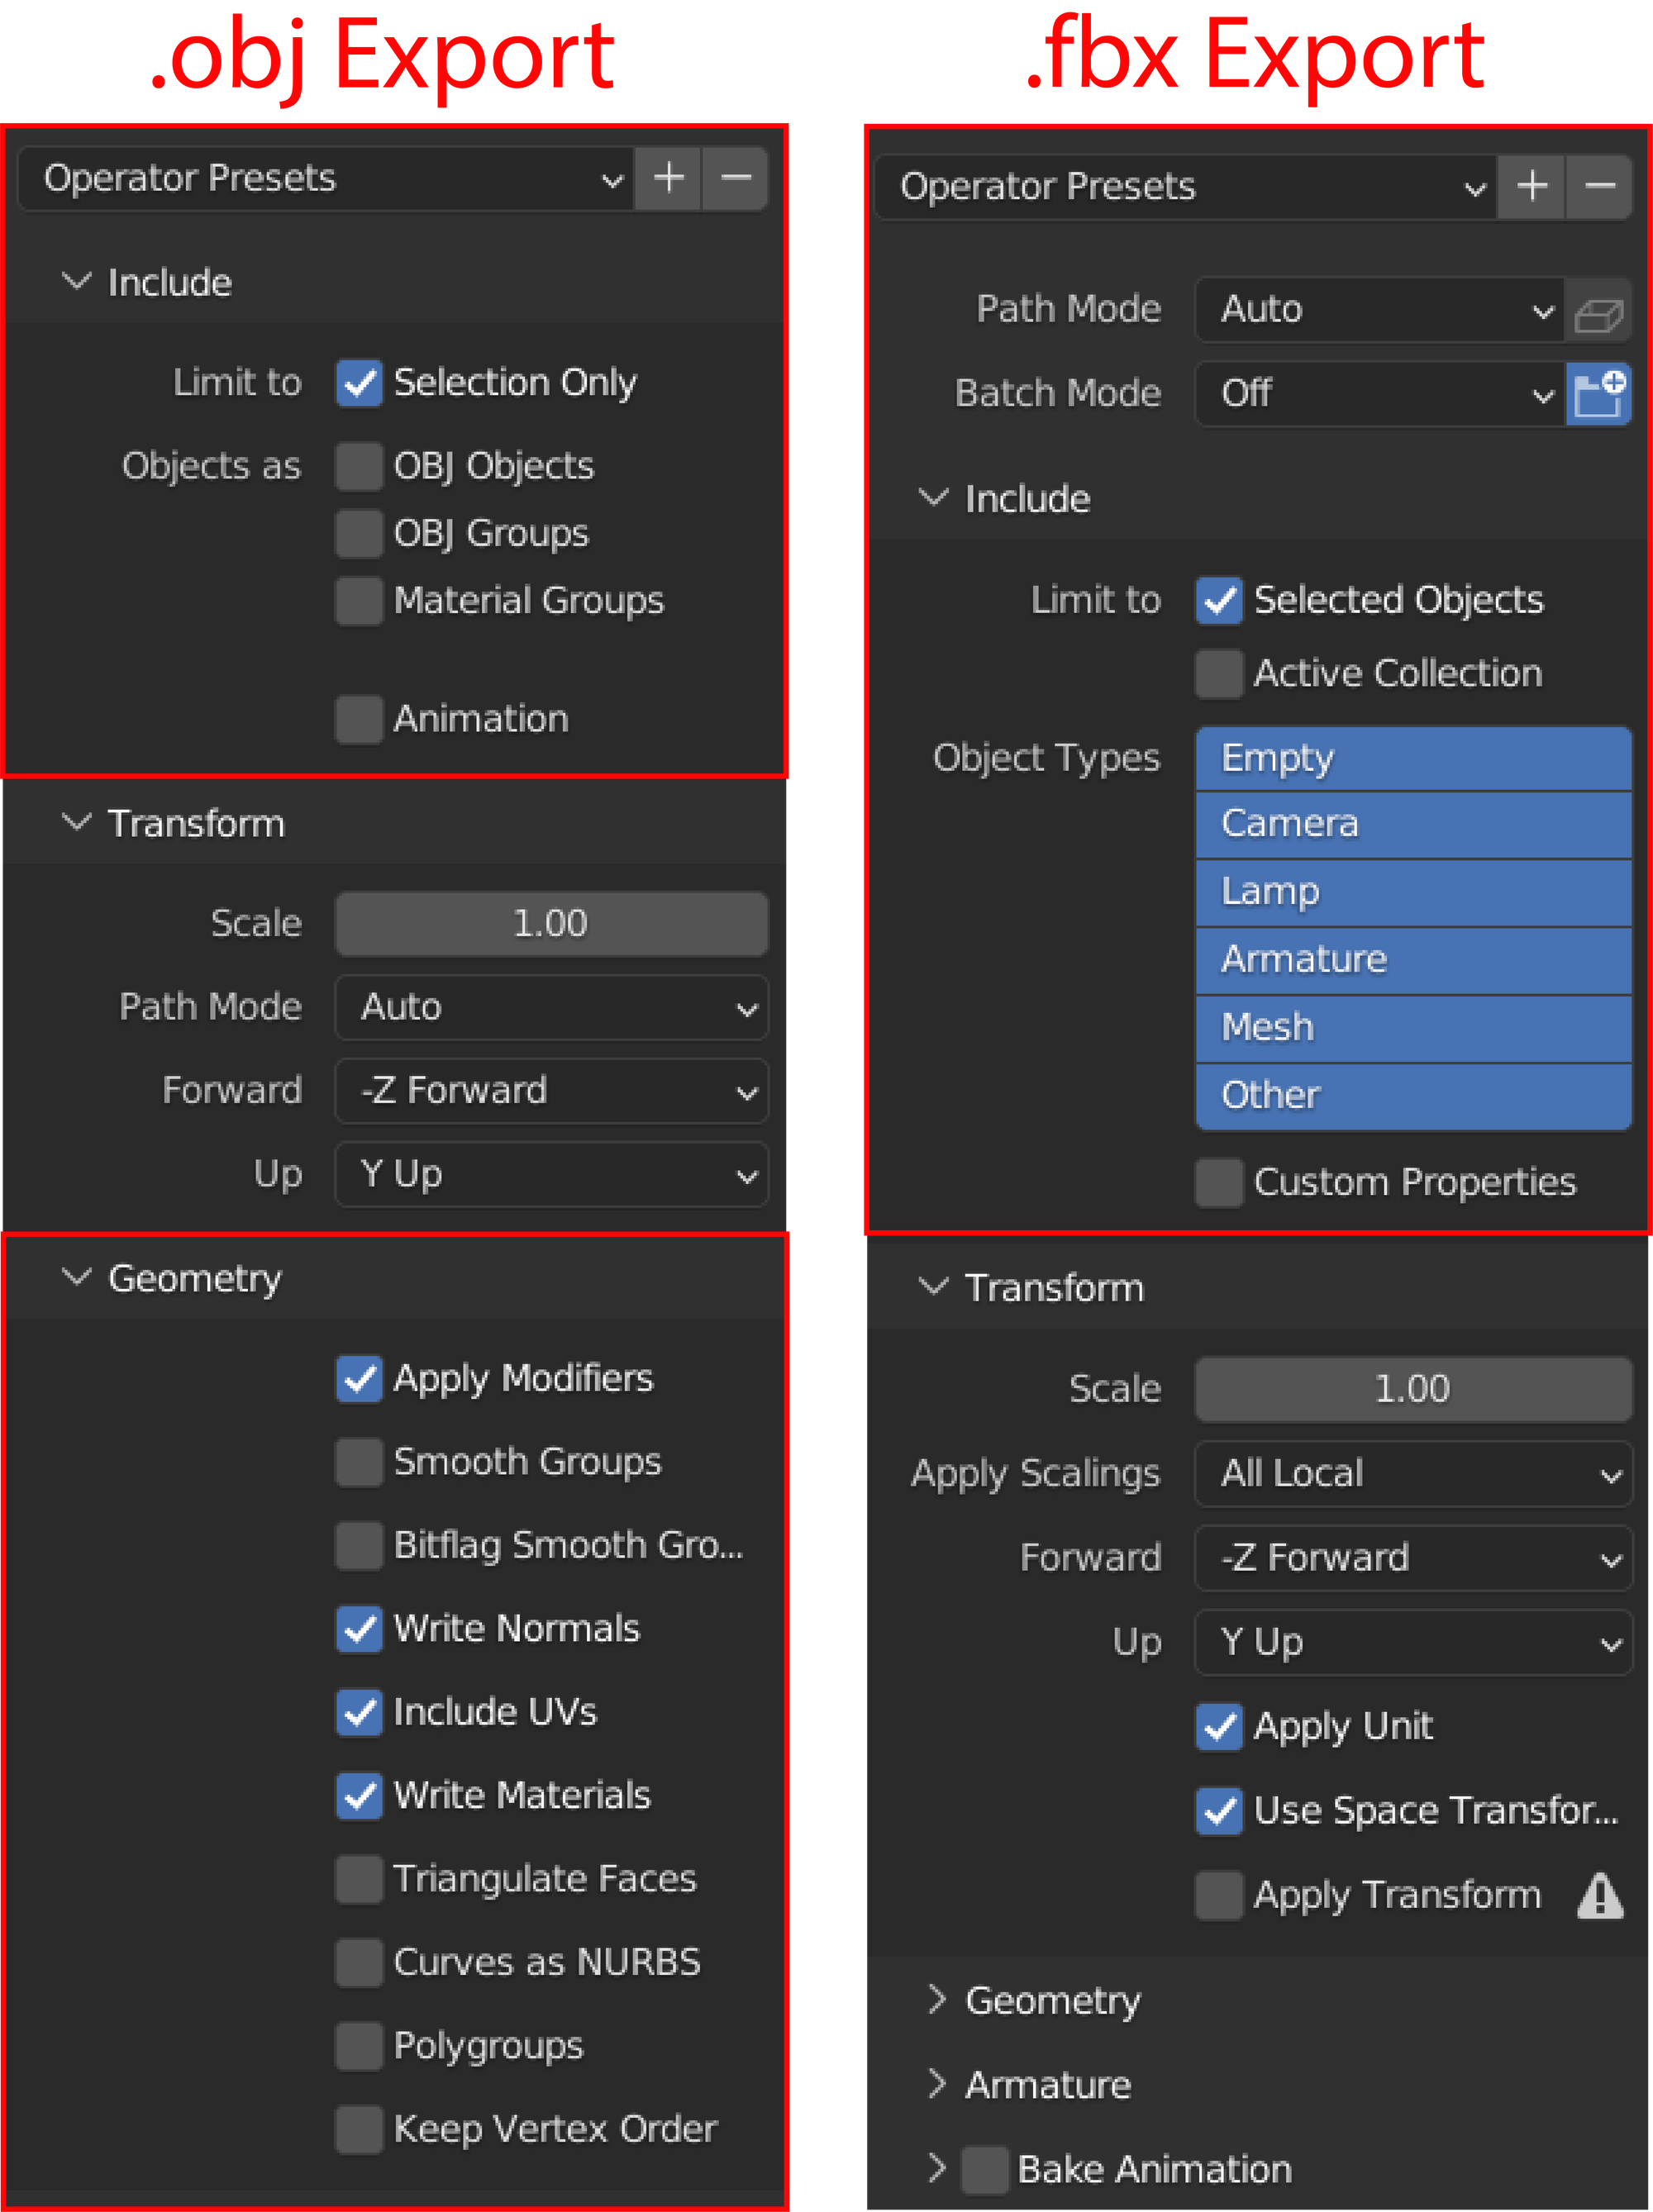
2. File > Export > Wavefront (obj)
a. You can also export as .fbx, this is purely preference
3. Make sure the export options panel on the right is showing. If not, press ‘N’ to show it
4. Change settings to match below
a. Limit to: Selection Only
5. All other information should be selected by standard
6. Save the file. It will save both a .obj and .mtl file
Importing into Substance Painter
Here is how you can import a model from Blender into Substance Painter
1. File > New
2. Select the file you want to import
3. Follow the settings below
a. If you would like to texture at a higher quality, increase the Document Resolution
This will make your final file size quite a bit larger
b. Selecting “Auto-Unwrap” will unwrap any pieces that didn’t get unwrapped in Blender
4. Proceed to texture your model however you like
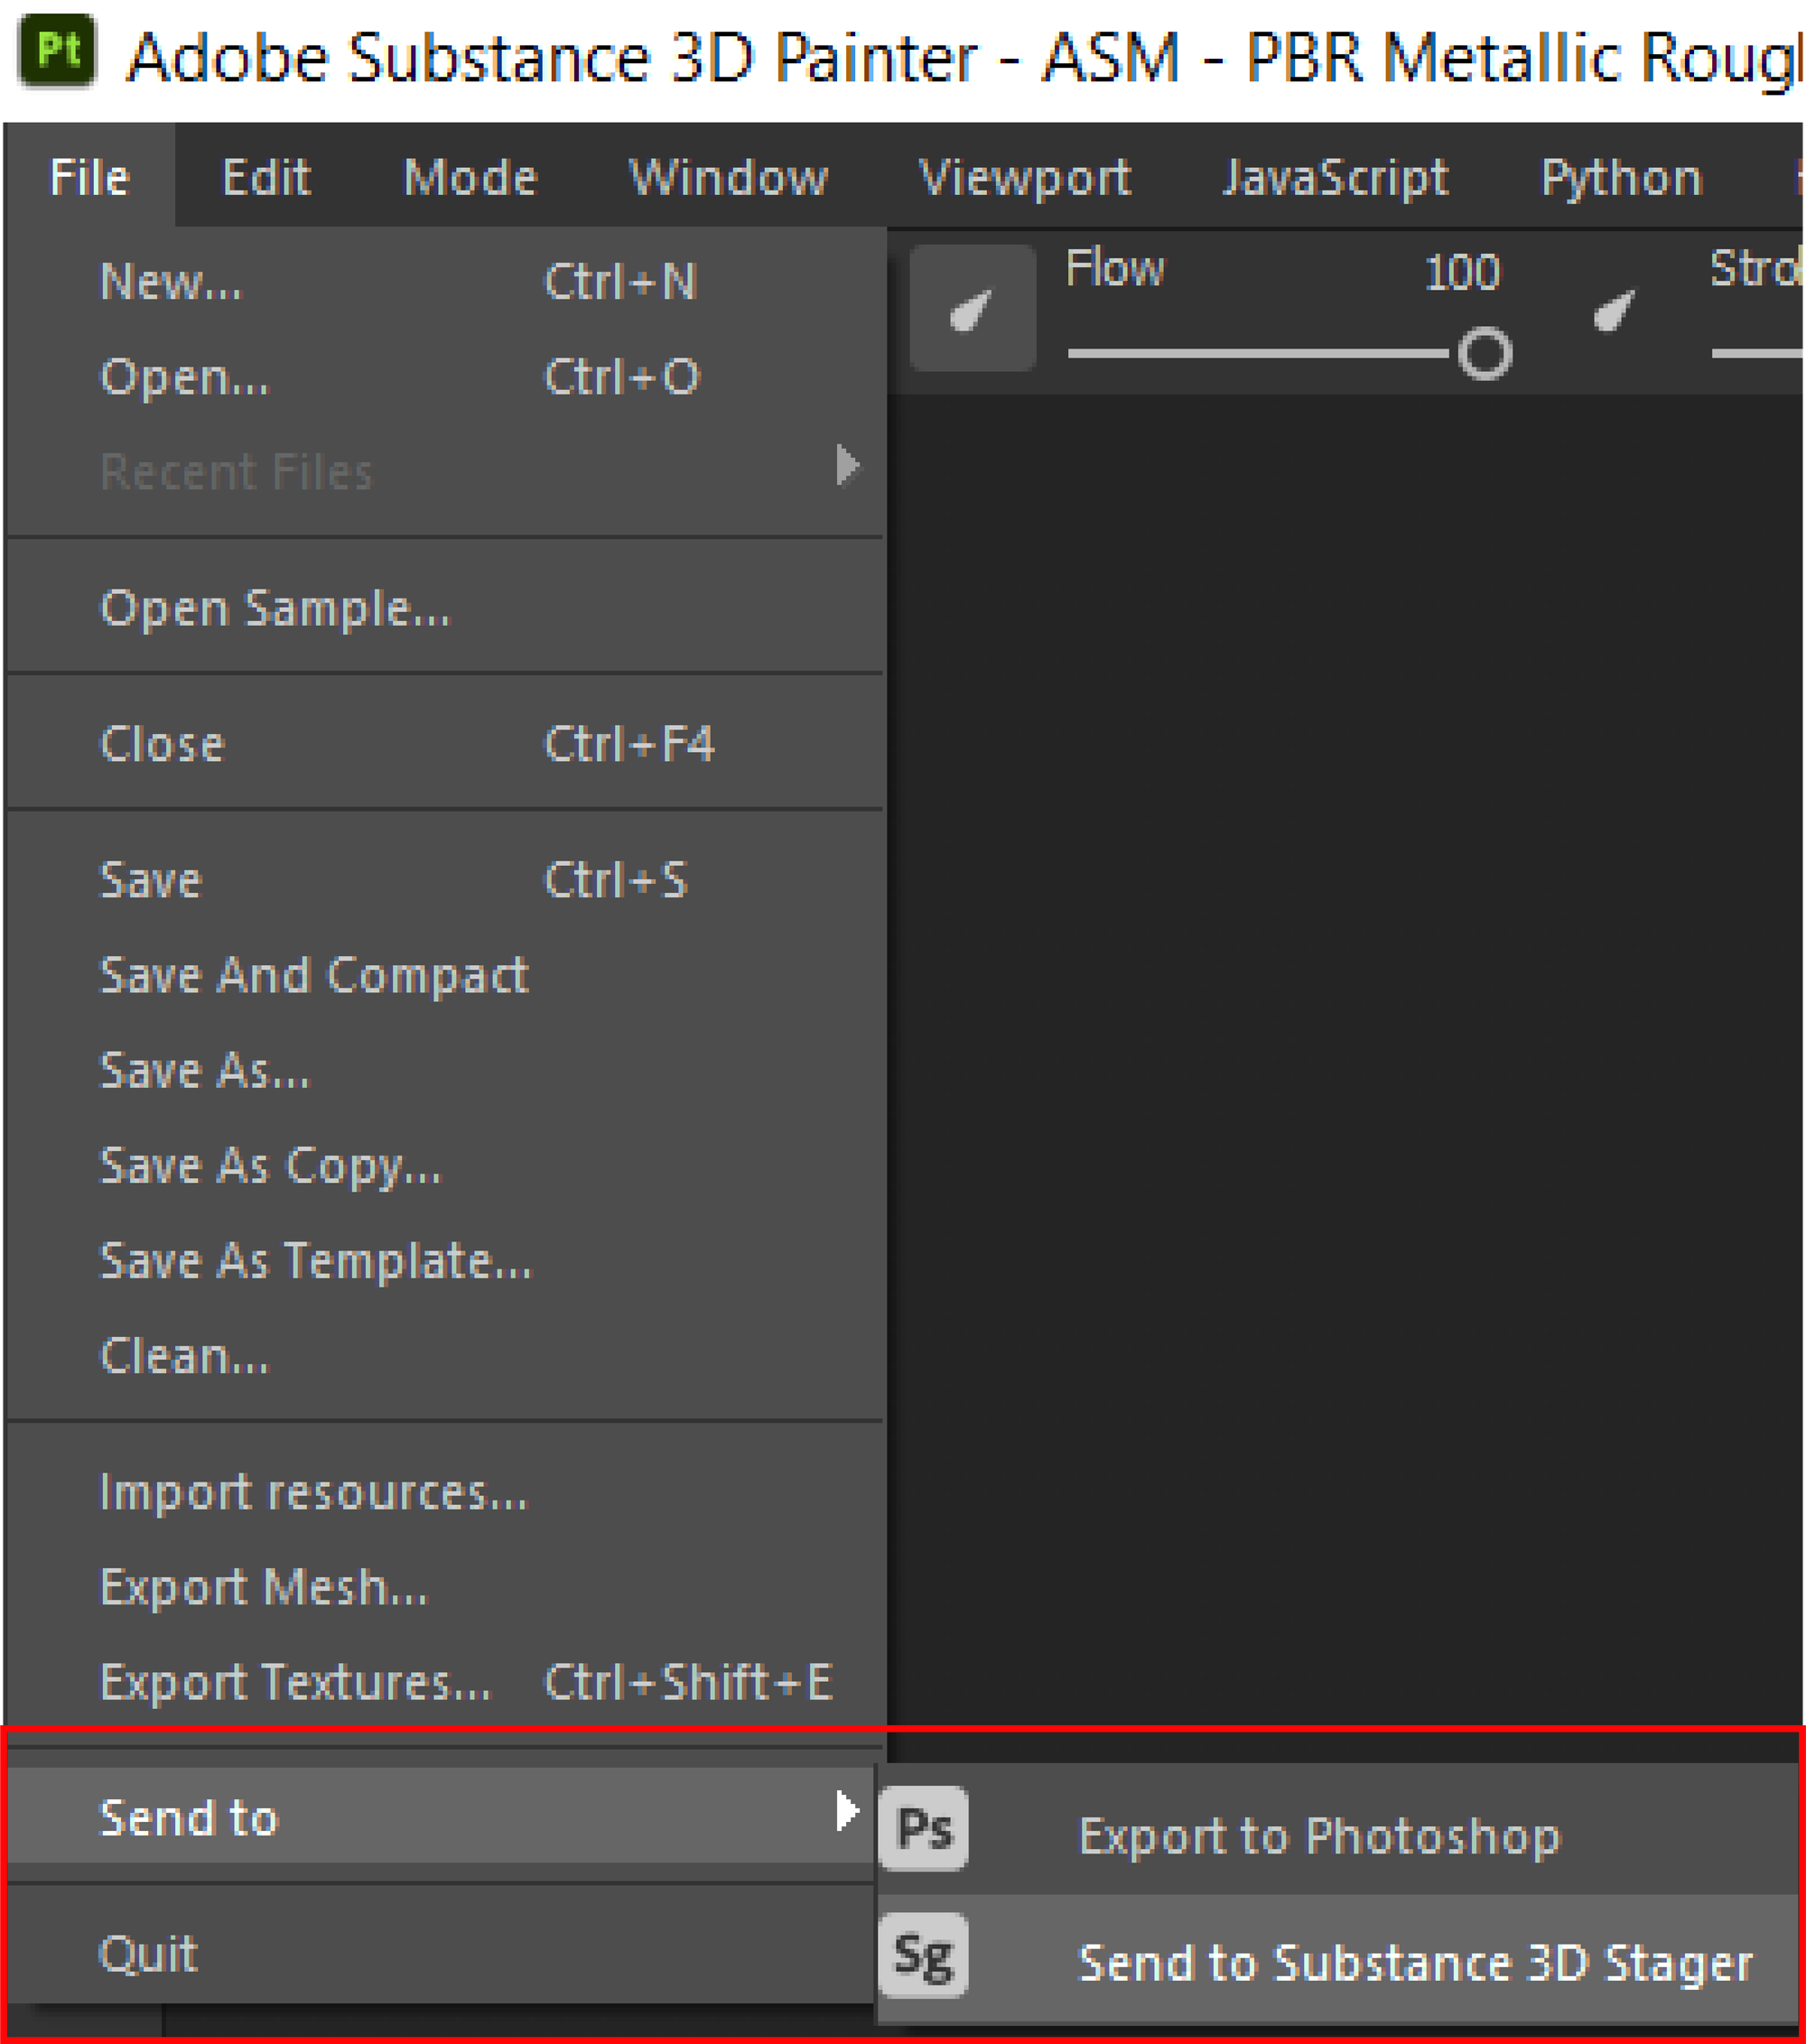
Sending Substance Painter file to Substance Stager
This step will demonstrate how you can send a Substance Painter file to Substance Stager for rendering and exporting. From here you will be able to export a GLTF file that will bake your texture, bump, ambient occlusion, normal and diffuse maps into one comprehensive file.
Once in Stager, you can set up lighting scenes to create optimal product shots.
Exporting GLB file from Stager
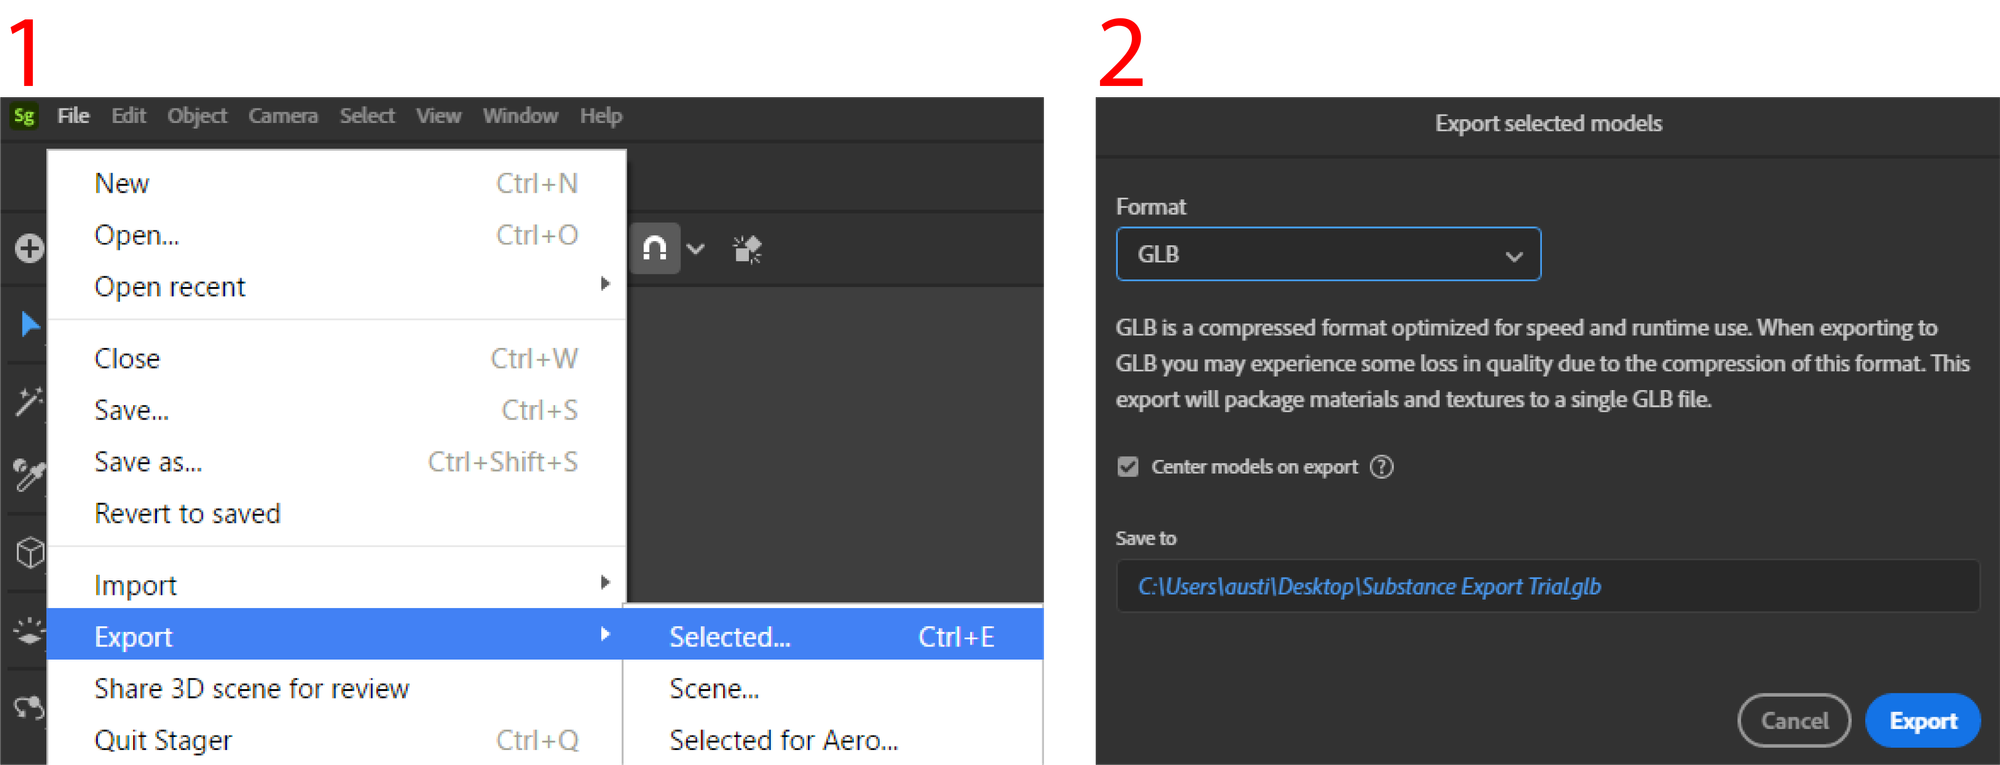
Once you have imported your file into Adobe Substance Stager, you are then able to export the GLB file. This file will allow you to export out with all of your textures baked in. Follow the steps below to do this.
1. File > Export > Export Selected
2. Format > GLB
3. Always Check “Center Models on Export”
4. Save to the desired location
Once exported, you can then import it into your Landing pad and use it as a prefab!