Thicken & Offset
Introduction
You can use this feature to thicken or offset all SubD surfaces. Learn how to access and use both options in this article.
Access
Thicken & Offset is located in the SubD menu when you are editing SubD objects.
- Grab the surface
- Get into Edit mode (press the Blue Edit button)
- Convert the surface to a SubD surface
- Turn Thicken/Offset toggle on
- Grab and pull the yellow arrows outward or inward to thicken or offset your surface. At the same time, the readout that shows the thickness measurement will appear showing the distance.
The distance increments to which the thickened surface tool snaps are based on the sketch scale.

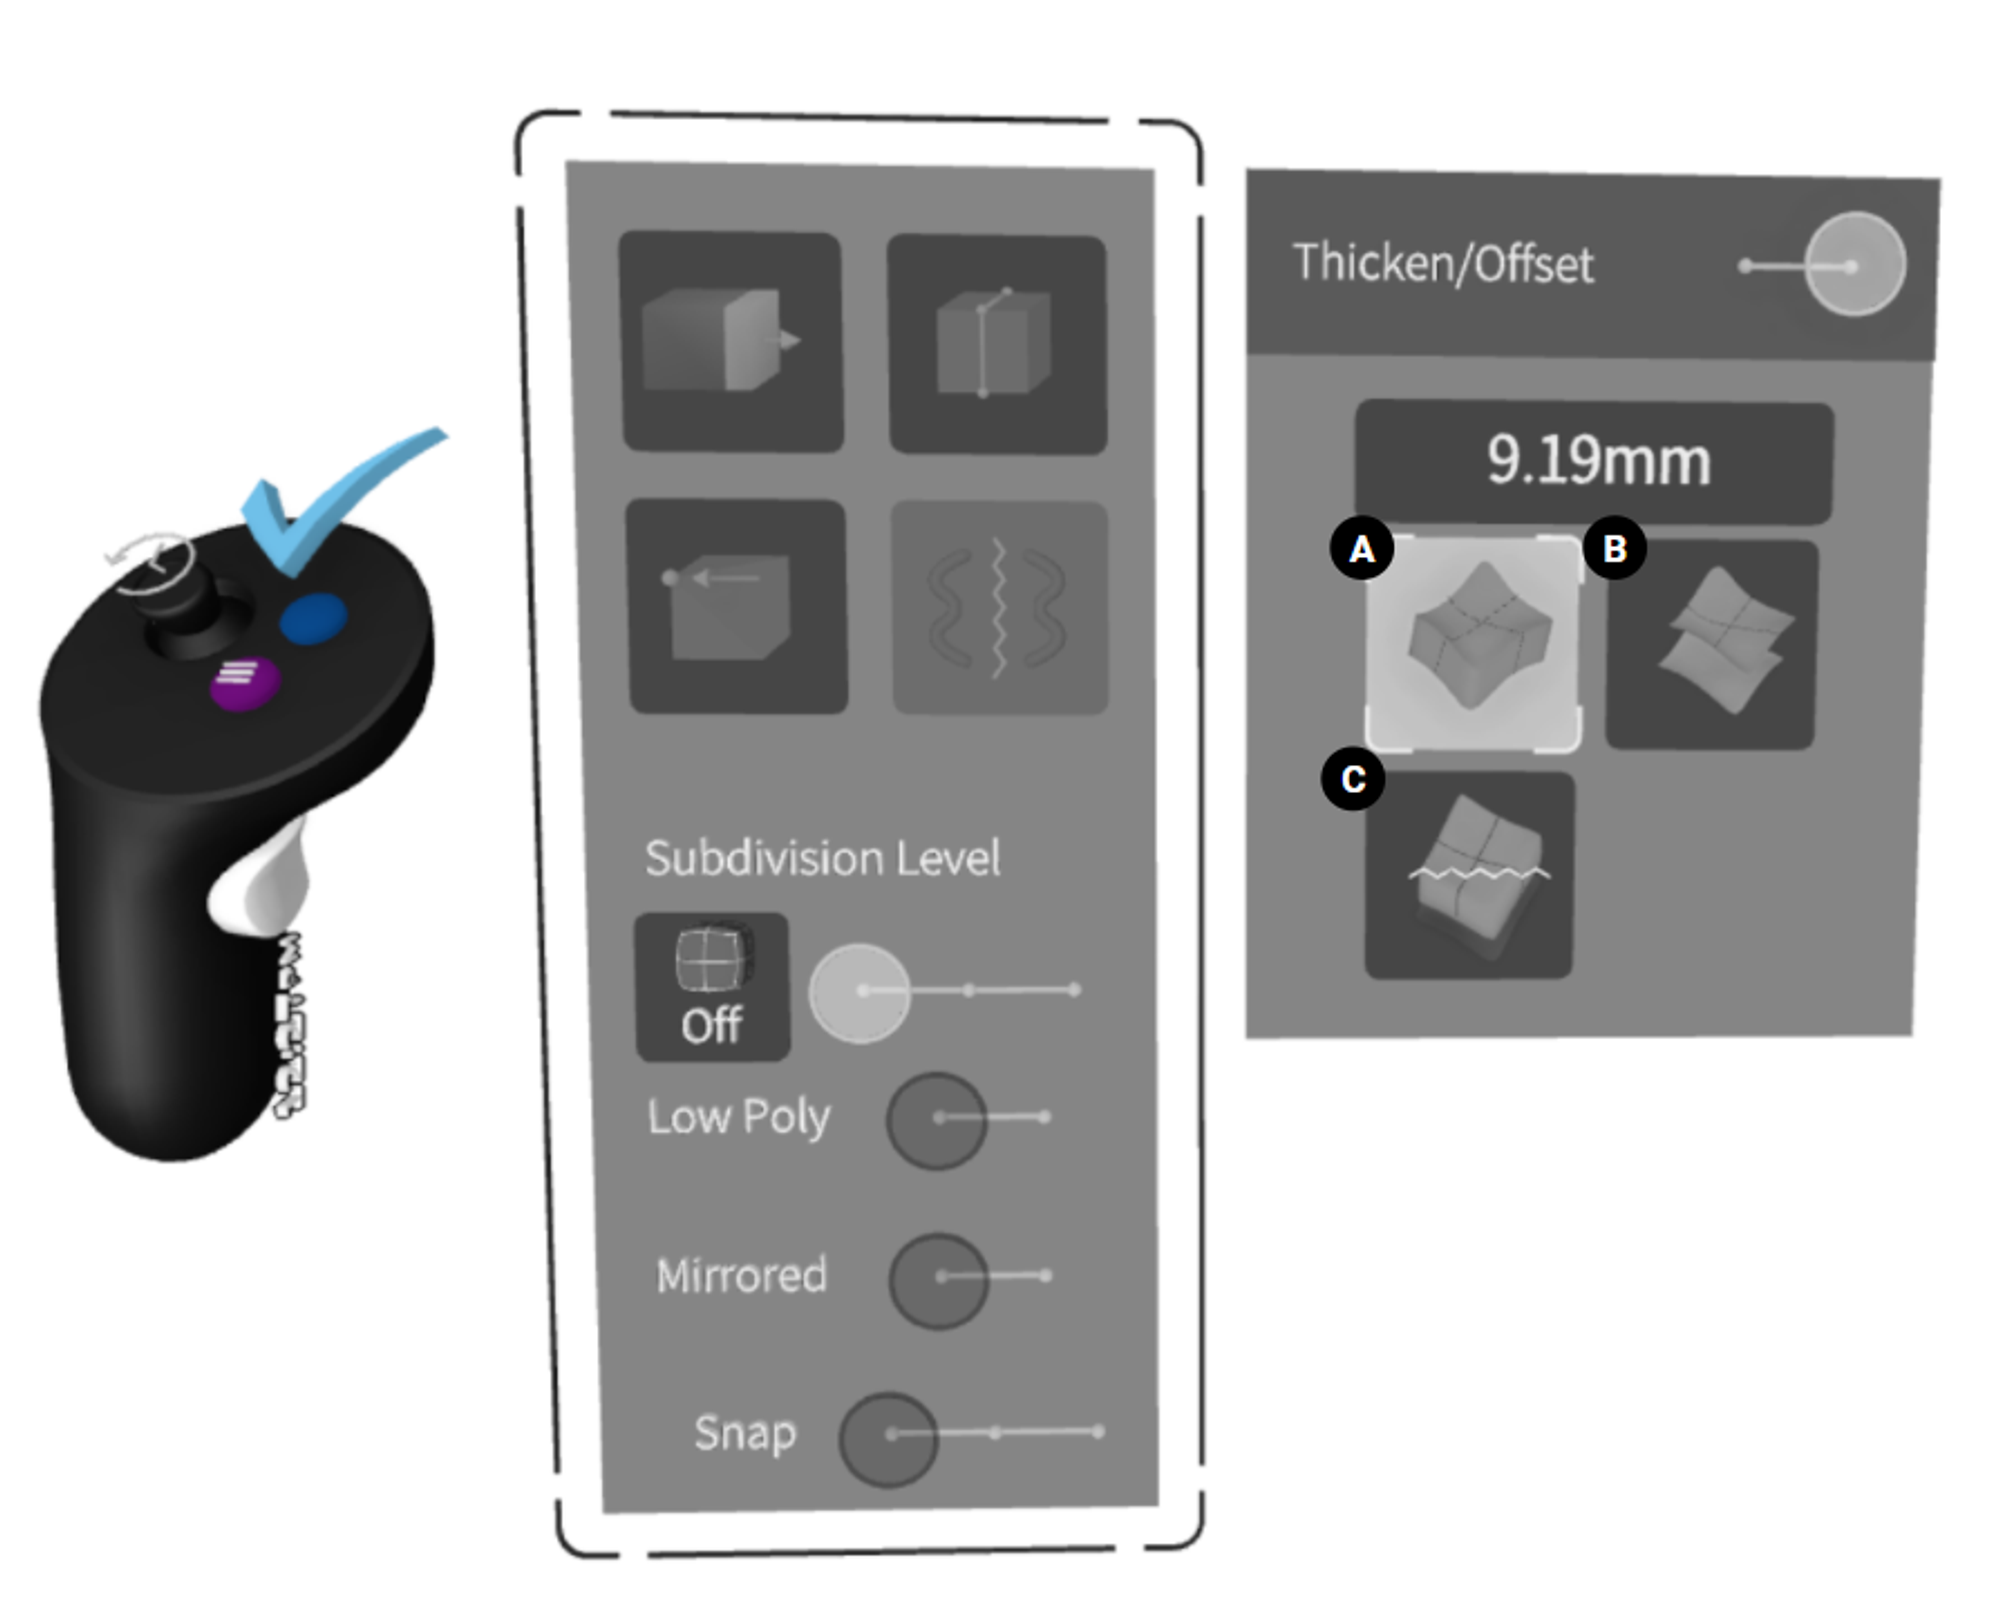
The Thicken & Offset Panel
A. Thicken
B. Offset
C. Bake Thicken/Offset

Thicken option
You will need to pull the yellow arrows to thicken in whichever direction you would like - similarly to the Offset option but with walls on the sides of the surface.
When baked (option C) it will create a SubD object that is thickened and has soft edges. To create hard edges you will need to create edge loops close to the edge.
Bake Thicken will also separate the thickened surface from the original mesh. As such the thickened SubD surface will be fully manipulatable (you will be able to add edit points and extrude faces as with any other SubD surface).
Offset option
If you move the original surface offset stays the same as the original surface. It manipulates and moves together with the original mesh.
If you bake the offset (option C), 2 separate surfaces will be created and you can manipulate them separately.
Feature Walkthrough in VR
In the walkthrough file (accessible in VR: Lobby>Reference Library>Gallery folder>Thicken & Offset Walkthrough), you can learn how to use the Thicken & Offset tool in-depth.

